Welcome to StepDragon's Texturing Tutorial for Dolphin
NOTICE: This tutorial is out of date. It both uses techniques which are not as effective as current ones, and uses an older version of dolphin. The next time I update my dolphin version, I will update the tutorial. For now, forgive me if it is unclear / incomplete.
Click on any picture on this page for a full size version.
Click on any picture on this page for a full size version.
Preface
In this tutorial, I'm going to be going over the basics of dolphin texture dumping, loading, and modification. I'm no expert, so I won't have all the answers. I make assumptions like any other. The purpose of this tutorial is to share my experiences so that others can get started right away without making simple mistakes that put them back on their projects.
I also realize that not every game is the same. While the methods explained in this tutorial may work in one game, they may not in another.
I also realize that not every game is the same. While the methods explained in this tutorial may work in one game, they may not in another.
Programs Used:
Dolphin Revision 7530
I'm using r7530 because its fairly recent, and most of the new revisions are really similar. I had been updating them for a while, until I realized that the only advantage I was getting from a newer revision was that I had to re-input my settings, and relocate my texture folders. For the purposes of this tutorial I'm going to be giving screenshots and settings advice based on r7530.
UPDATE: It seems that texture dumping and loading has been broken in post 3.0 versions of dolphin. This tutorial should work for most prior versions.
Paint Shop Pro
Ever since my parents bought me an early version of PSP when I was a kid, I fell in love with it. I have since attempted to use Photoshop as well as the GIMP. Neither suited me and I've been using PSP ever since. Forgive me if this causes issues with my tutorial because you're using a different program. Its what I have, and what I use. Screenshots will reflect that.
Adobe Illustrator
Why? Because nothing does vectors quite like it. Like PSP, I use Illustrator over other choices such as Inkscape because I just like it better. I don't think I'll be using Illustrator in this tutorial, mainly because I only really need to do it on advanced texturing, where I'm drawing from scratch rather than manipulating photos. I'm not going to be doing anything too advanced in this tutorial, I'm trying to keep it short.
FRAPS
I use FRAPS to take in game screenshots and movies. One could use windows for screenshots, but for multiple shots in game, or movies. FRAPS is the way to go.
Getting Started:
Like I said before, I'm sure there are better methods of dumping and loading textures. Therefore, if you look at my method and think “WHY IS HE MAKING THAT SO COMPLICATED?” Please let me know how to do it better! This is a method produced from trial and error. If there are advanced methods that you know of, I can always rewrite the tutorial. Thanks.
Sorry, I just remembered. I only use the DX9 Video plugin. This may cause some problems if you use a different plugin. I haven't done any extensive testing on the other plugins, so I cannot say if a different plugin will give the same results.
Sorry, I just remembered. I only use the DX9 Video plugin. This may cause some problems if you use a different plugin. I haven't done any extensive testing on the other plugins, so I cannot say if a different plugin will give the same results.
Dolphin Settings for Texture Dumping
There is only one ABSOLUTELY NECESSARY setting for texture dumping in Dolphin.
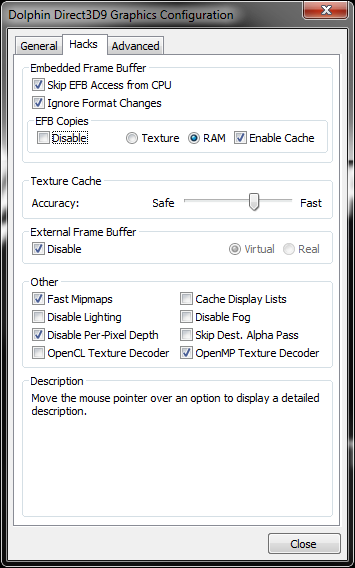
Under Graphics Configuration > Hacks > EFB Copies
EFB copies CANNOT BE SET TO TEXTURE.
If EFB is copied to texture, then any visual effects that appear on screen will be turned into textures before being displayed. If this is enabled when dumping textures, effects that cover the entire screen are dumped as well. This spams your texture dump folder with THOUSANDS of unusable textures. It is best to either Disable EFB copies, or do what I do and Copy to RAM.
Under Graphics Configuration > Advanced > Utility
Dump Textures - Enable
Enabling Dump Textures will save a PNG copy of every texture that is loaded into the emulator RAM to /User/Dump/Textures/GameID.
Dumping Textures:
This may sound like a walk in the park, but there are a few things to keep in mind when texture dumping. NOTE: there are a few Twilight Princess specific things addressed in this section. I have not dumped textures from every game, so I cannot know if every game has these problems, or how to fix problems arising in other games.
The Basics:
Enable Dump Textures, load up the game, and play. Any textures that get loaded during your session will be dumped to the dump folder.
The Problem:
Some Dumped Textures are less than desirable. In Twilight Princess, for example, The Map which appears in the lower left corner is a generated texture which is then copied to the screen. This results in a texture being dumped 30 times a second the entire time you're dumping. The result is that in only a few minutes of dumping you end up with 15 thousand map textures and are unable to sort through them, because there's just TOO MANY!

Plenty of Map Textures
The Solution:

Removing Generated Textures
This may not work on all systems. I've been told by others that texture naming may be system dependent. I'll be researching this in the coming days. While looking at my dump folder, I noticed a trend. Textures were named GAMEID_ADDRESS_##.PNG This is interesting because I noticed that all of the generated map textures (as well as maybe 0.1% of other textures) all ended with “_9.png”. This makes it fairly simple to clean up the folder. Simply use windows search to find all files “*_9.png” and delete them. You can either first copy out the three or four files that are not map textures (In my experience only a few HUD textures) or just delete them anyways, they'll get dumped again.
Now you have a nice clean Dumped textures folder, without having to worry about having 20x the amount of textures that are unusable.
Identifying Textures:
Why Identify Textures? There are a few reasons. First, you want to be able to look at the texture in game while you're working on it. This is because you want to have feedback on how the texture will look in the game. Many times the texture will become semi transparent, or be overlain with another, making its colors or contrast off. Other times you might have multiple texture side by side, and need to scale them to match so you don't have textures that look different. On the same note, you might have a texture you did much earlier in the project right next to a new one, and you want to make sure you make them look similar enough that you don't end up with seams. Finally you never know if a seamless texture is really seamless unless you look at it in context.
New Method:
There is an easy way to identify multiple textures at a time. To start you will need two programs.
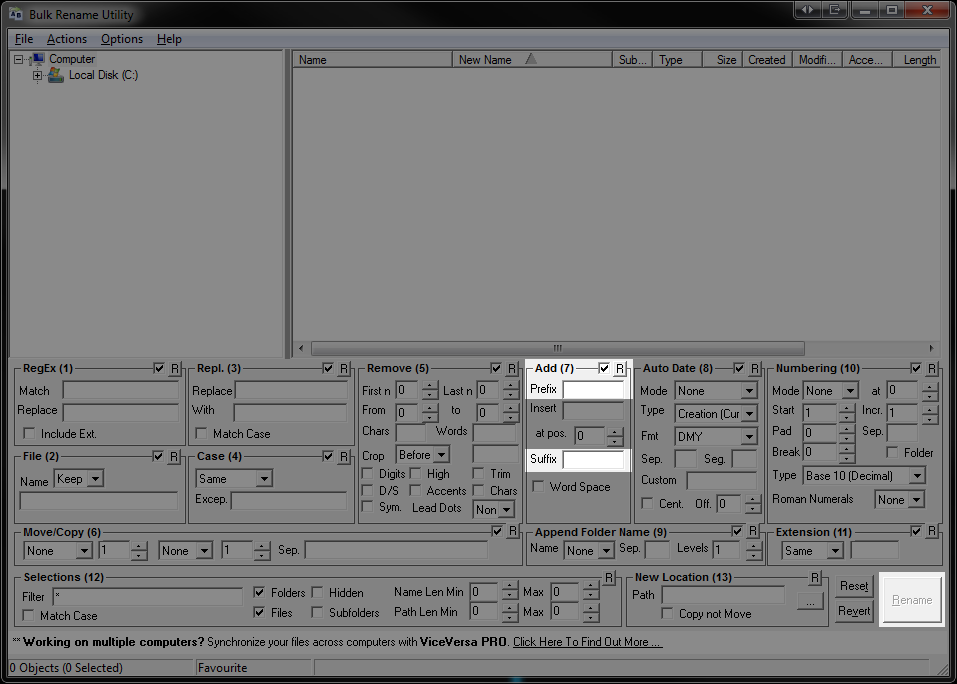
Bulk Renaming Utility
An Image Watermarking Utility that supports name watermarking. Sorry, no free link. I got this from GoTD and It works so well, I can't find a replacement.
Start by copying your entire dump folder to a sub folder in your load directory. Next, make a copy of that folder. You want to have backups of the files. Finally open up the renaming utility. At first, it will appear very complicated. Don't worry about it. The Picture below shows everything you need to worry about for this step.

Removing the GameID and Extra Numbers.
Start by navigating to the original load directory (the one you backed up). In the side pane, select all the files you want to rename. (The only thing you want to take note of is if files have different length filenames)
For example, you want to select files in groups of file name length.
GAMEID_XXXXXXXX_##.png vs.
GAMEID_XXXXXXXX_#.png
Now in the remove section. Tick up the "First n" and "Last n" until you just have XXXXXXXX.png left. Make sure you take note of which files had which numbers. You can always move them to new folders.
Click Rename, and hit overwrite.

Applying Watermarks
The next step is to create a watermark on the image. Go into your watermark program, and set it to watermark the filename onto the textures. Choose a relatively small font size, and a noticeable color, like hot pink.
If you have the option to tile the watermark, that helps also. It makes it so that you have more opportunity to find it and identify it.
If you have the option to tile the watermark, that helps also. It makes it so that you have more opportunity to find it and identify it.
Adding Prefix and Suffix
Now you need to set the filenames back to what they were before you shortened them. This will allow them to be loaded back into dolphin and for you to see them in game.
If you seperated each set of files into their own directory, it will be simple to rename them. Simply add a Prefix of the "GAMEID_" and a suffix of "_XX".
Now load up your game and look for some textures. Keep in mind that your backup folder cannot also be in the load folder, or the emulator might get confused.
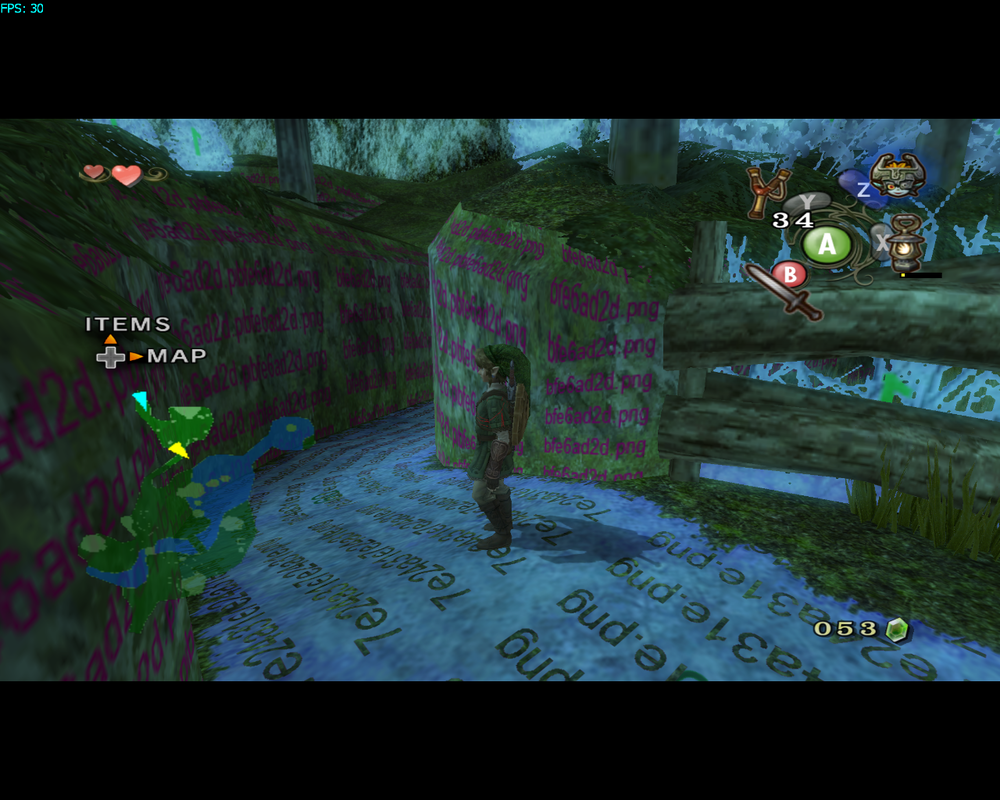
Texty!
Once you've found a texture in game with text on it. Take note of the XXXXXXXX. Find the file in your backup directory, and use it to replace the text version. Now you can move right on to texturing that file. Another thing you could do, is instead of texturing right away, sort all the files into area specific directories, so that you can come back and work on them later.
Now you're ready to move on to Texture Modification. Alternately you can read the old method below.
Now you're ready to move on to Texture Modification. Alternately you can read the old method below.
Old Method:
The first thing to do is to save your textures into the 'User/Load/Textures/GAMEID' folder, if you haven't already. Using a sub directory is ok. In addition, you need to disable Texture Dumping, and enable Load Custom Textures under Graphics Settings > Advanced > Utility.
The first thing to do is to save your textures into the 'User/Load/Textures/GAMEID' folder, if you haven't already. Using a sub directory is ok. In addition, you need to disable Texture Dumping, and enable Load Custom Textures under Graphics Settings > Advanced > Utility.
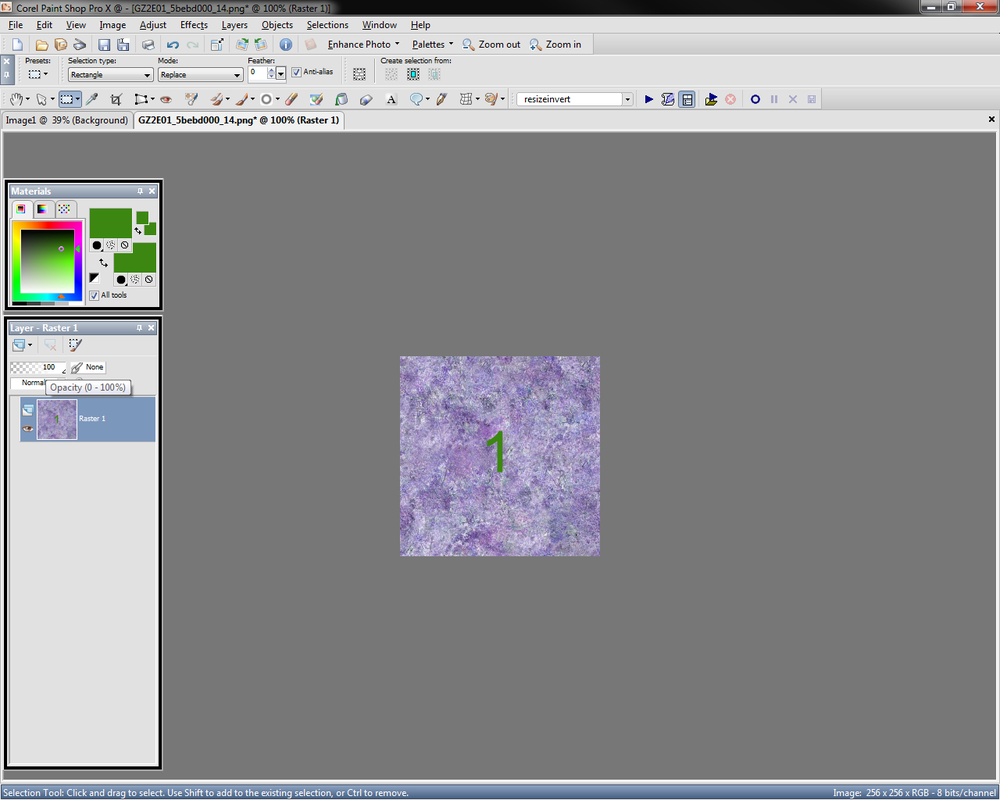
Inverted Texture
My method of Identification would work better if I had a team doing it for me. Basically I take all the textures I've dumped so far, open them up in an image program, invert the colors, and then put a large unique number on them for easy visibility. Save it to your load folder and now whenever you're in game look for off color textures with numbers on them. Find one in game, and now you're set to work on that texture while knowing exactly where to look in game. Using this method, you can ALWAYS look at a texture in game while working on it.
Easy to find
There is a downside to this. The problem is, when working by oneself, it takes a long time to number all the textures. I'll get a few done, and then go modify some of the ones I've done. This becomes a problem when people want an early version of the texture pack, because the textures that have been done are scattered over many different areas. If a team could do all of the invert work and organize the textures by area, then the texture artist him/herself can work area by area.
Texture Modification:
There are more advanced methods for texturing. I'm going to be outlining one of my more simple techniques. I'll be making a simple grass texture. This same technique works on almost any seamless or simple texture. Fore more advanced textures such as cloathing, faces, or signs, I may add a section to the site at a later date. For now sorry, but that's outside of the scope of this tutorial.
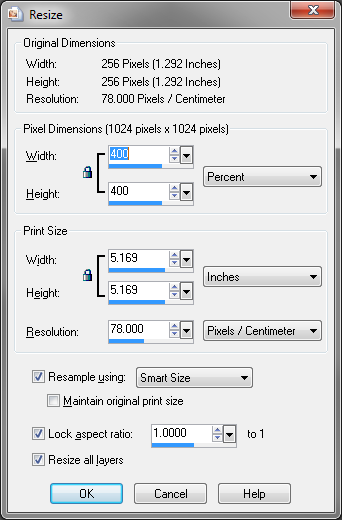
Before you go any further, blow that bad boy up! I usually resize 4x to 8x the size of the original texture. ALWAYS use a multiple of 2. You need the resolution to add more detail. Before you continue, you want to make sure that the texture will load at that size. Not all textures or games will have the same size limit. In Twilight Princess alone, I've had some textures stop loading at 512pix while I've had others up to 2048pix.
Load up your texture! At this point you'll be starting with an inverted and numbered texture. I don't bother to keep backups of the texture files because its actually faster to do this. First correct the colors by inverting the image. Then we need to get rid of the number we used for identification. I just use the clone brush and erase it. Sometimes it won't matter because we won't use any of the original image, but sometimes I'll layer the old image on top of the new one for various reasons. I'll be doing that on our grass texture, so follow along.
Load up your texture! At this point you'll be starting with an inverted and numbered texture. I don't bother to keep backups of the texture files because its actually faster to do this. First correct the colors by inverting the image. Then we need to get rid of the number we used for identification. I just use the clone brush and erase it. Sometimes it won't matter because we won't use any of the original image, but sometimes I'll layer the old image on top of the new one for various reasons. I'll be doing that on our grass texture, so follow along.

At this point we should have an image that more or less looks like our original texture. Next we want to start gathering resources. I've actually got a folder designated to this. Just go out on the internet, and ransack some free texture libraries. Many will allow you to use them for anything you want. If you do find the perfect picture and its not free, please ask permission from the content owner... You don't want your pack taken down and to get sued do you?
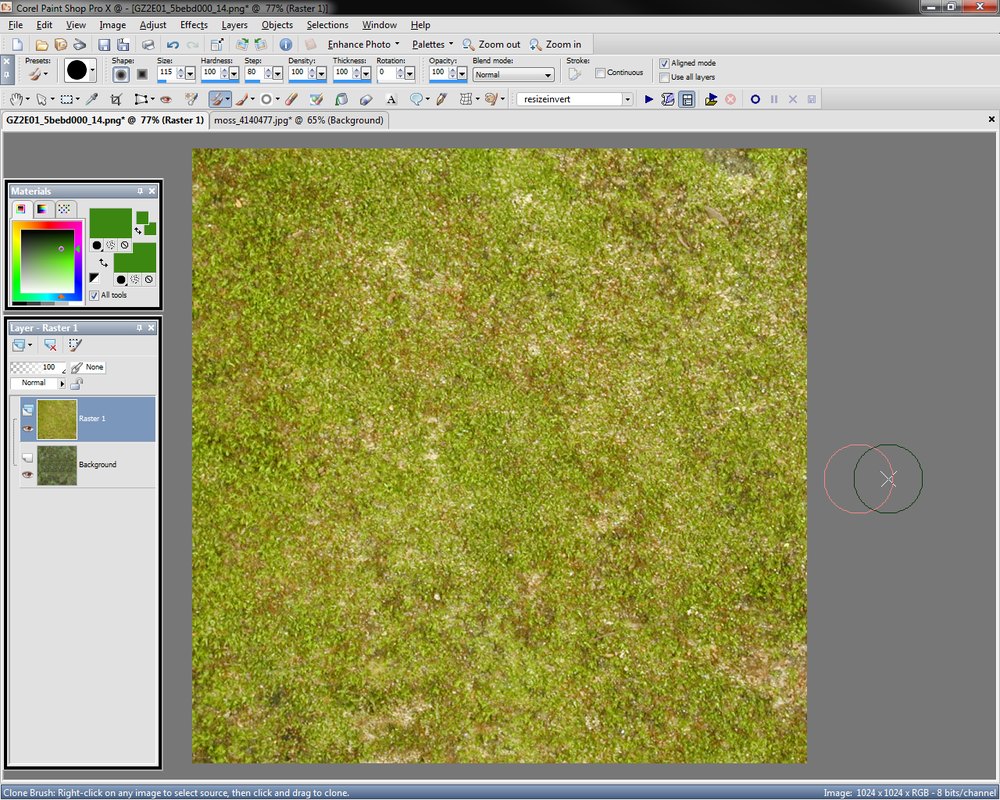
Continuing on; Load up your resource images. In PSP this can be done by simply dragging and dropping. Now start layering them on. Make a new layer for each image you want to incorporate. For this texture I'm just going to be using one picture for my source. A stock photo of moss. Why moss? Because its got small round dots, of varying color and brightness. Which makes a good grass texture. Some people may want to know why I don't use a grass texture for grass. That's because a game texture is flat, and grass isn't. If you use a texture from grass your either going to have grass blades that are way too large for your character, or your going make it look like he's standing on hay, or even needles. Sometimes simpler is better.
Next I want to get rid of anything not on our image. In Paint Shop Pro, the canvas is not the limit for anything you put on the picture. If you paste something off the canvas, its still there, but not visible. Use the selection tool to select the entire image (DO NOT USE CTRL-A) and then cut it (Ctrl-X) now hit Ctrl-A and delete. This will erase anything that wasn't on the canvas. Select your canvas again and go to Edit > Paste Into Selection or Ctrl+Shift+L. Now your image will be the same but without the nasty off edge garbage which will interfere with the next step.
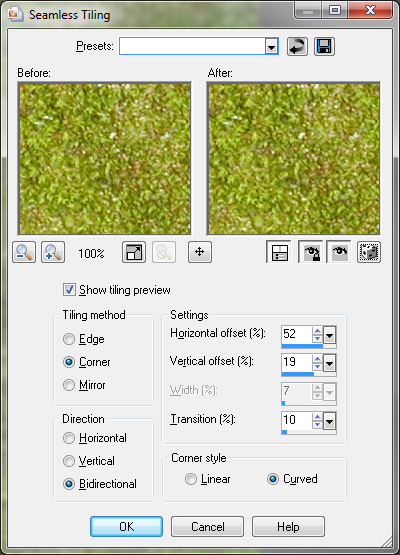
The next step is to make the image seamless. This adjusts the image so that when you tile them, you don't end up with sharp lines cutting the landscape into repeating tiles. Simply select the layer you wish to make seamless (the moss layer) and go to Effects > Image Effects > Seamless Tiling. Play around with the settings until you find something that works to your liking. If you don't know where to start, try hitting the dice button to randomize the settings. When you get something close to what you're looking for, adjust to your liking. Don't forget to make sure its Bi-Directional.
The next step is to make the image seamless. This adjusts the image so that when you tile them, you don't end up with sharp lines cutting the landscape into repeating tiles. Simply select the layer you wish to make seamless (the moss layer) and go to Effects > Image Effects > Seamless Tiling. Play around with the settings until you find something that works to your liking. If you don't know where to start, try hitting the dice button to randomize the settings. When you get something close to what you're looking for, adjust to your liking. Don't forget to make sure its Bi-Directional.

See the seams?
 Overlay Color
Now we get to the reason I had you keep the original texture on hand. For this grass texture, we want to overlay the original on top and blend the colors, so that in game the texture is the same color. Simply move the original layer on top of your new layers (if your original layer is named Background, it won't be able to be moved, simply duplicate it and delete the original) and set the bled mode to “Color (Legacy)”. This will make any layer below it the same color. If you find that the original is making the lower look lower rez, try blurring the color layer slightly. We only care about the color, not about the details.
|
 Don't forget to adjust the Brightness and Contrast! |
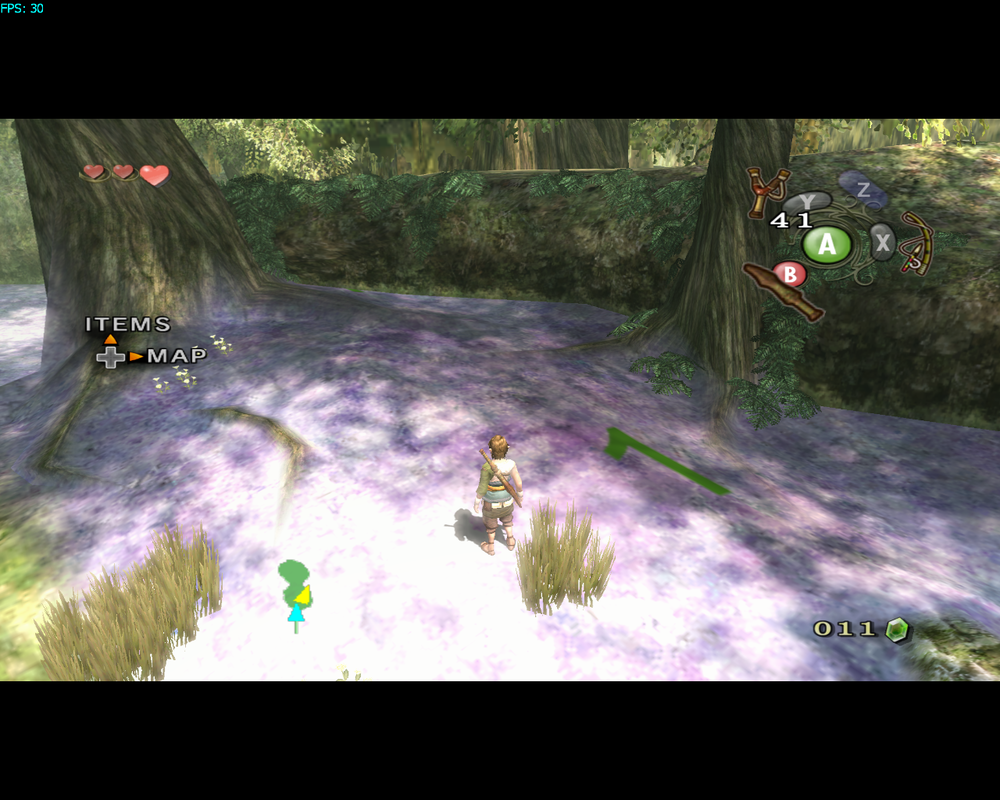
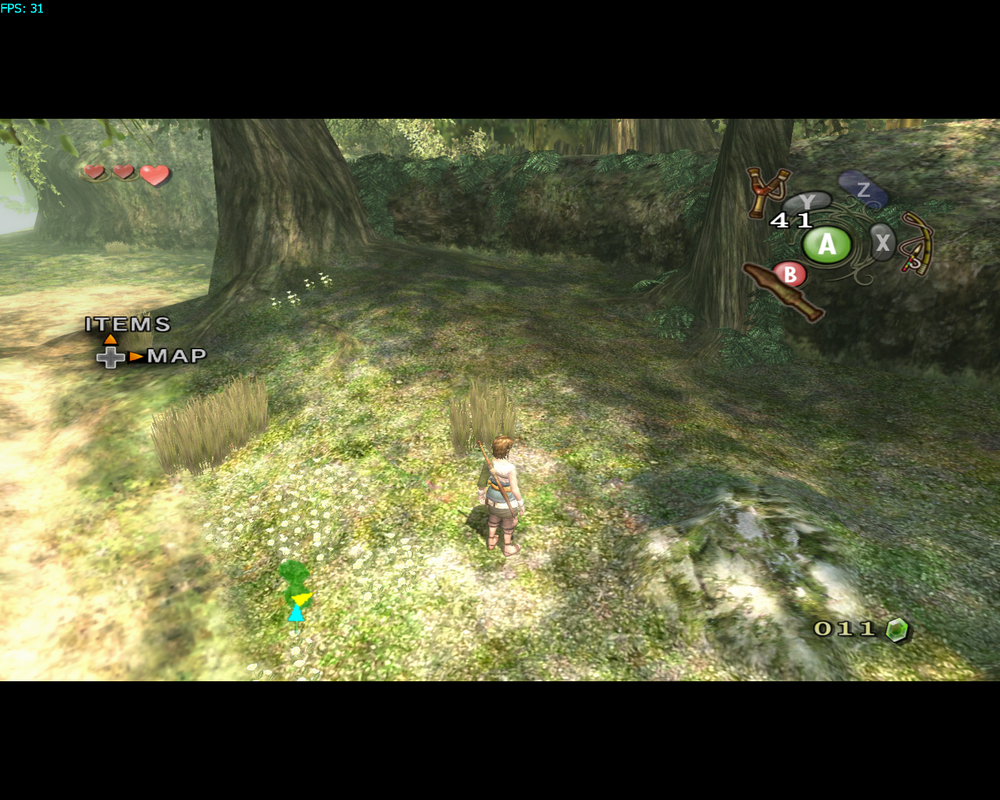
Load the game up, go to where your texture in progress is (save states work wonders) and check it out. Take note of brightness, color, contrast, size of details, and closeness in similarity to originals. If you need to make any changes do it now.
Finally when your done and satisfied, save your texture again. The next part is up to you. I only save an editable copy of a texture if its a WIP or if it was massively complicated. That way, if I need to edit it, or redo it at a later date, I'll have my original project to work from.
Finally when your done and satisfied, save your texture again. The next part is up to you. I only save an editable copy of a texture if its a WIP or if it was massively complicated. That way, if I need to edit it, or redo it at a later date, I'll have my original project to work from.
And here is the result of your *not so hard* work.
Texture Loading:

There is one setting that needs to be adjusted for Texture Loading:
Under Graphics Configuration > Hacks > Other
Fast Mipmaps > Enable
This will generate texture mapping information from the textures themselves, rather than loading them from the file. If this is disabled, many areas of games textures will be discolored in the distance. Finally just disable Texture Dumping, and enable Load Custom Textures. If you've been following along with the little quality controls, you're in for a great gaming experience! Of course you could spend much longer on a texture, add in other resources, and adjust it to your hearts content. Keeping this tutorial comprehensive and simple was my goal. I hope you found it useful.
If you have any questions or would like to make a suggestion. Feel Free to post in the Forum or to Email me via the form on the F.A.Q. page.
